Welcome to the World of Arduino!
Imagine turning your ideas into reality with a small but powerful tool—Arduino! It’s like a magic wand for anyone who loves building gadgets or experimenting with technology. You don’t need to be a tech genius—just a little curiosity is enough to start making things light up, move, or even talk!
In this beginner’s guide, we’ll explore what makes Arduino special, where it comes from, and how you can use it to bring your ideas to life. Think of it as joining a community of makers who love creating cool things—just like you!
What is Arduino?
Arduino is an open-source electronics platform that consists of both hardware and software components. It provides a user-friendly environment for creating and programming electronic devices and projects. The platform is designed to be accessible to beginners, but powerful enough for advanced users and professionals.
Key Components of Arduino
- Arduino Board: The physical hardware, known as Arduino boards, they contain microcontrollers that serve as the brains of electronic projects.
- Arduino IDE (Integrated Development Environment): The software used for programming the Arduino board is Arduino IDE. You can easily install Arduino IDE from Arduino Official page. The most favorite thing of me in this IDE that they provide many built-in libraries so that you can easily use them without writing them from scratch. It just simplifies the programming process.
- Language: A simplified programming language, similar to C++ is used in Arduino. If you know just basics of C or C++ like header files, loops, basic syntax of C language, input and output methods it’s just like a game of 2 to 3 days for you to grip your skills on Arduino.
How Arduino Works
- Programming:
Users write code in the Arduino IDE using basic C++ or C language.
- Uploading Code:
The code is compiled within the IDE and then uploaded to the Arduino board via a USB connection.
- Interaction with Components:
When you power up the Arduino board it will executes the uploaded code, interacting with various electronic components such as sensors, motors, LEDs, and more.
Types of Arduino
Arduino comes in several types, each catering to specific needs and preferences. Here are some of the common types of Arduino boards:
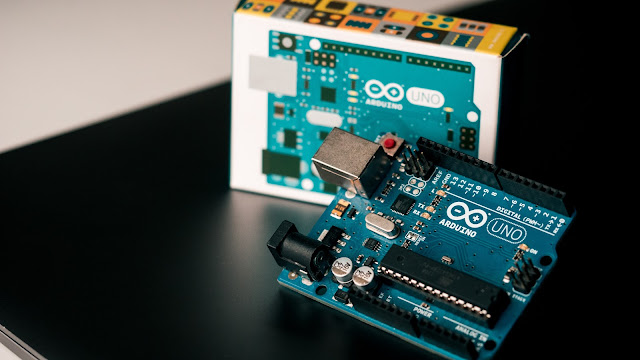
1. Arduino Uno(The most popular): The most popular and widely used board, Arduino Uno is an excellent choice for beginners. It features a simple design, making it easy to understand and work with.
2. Arduino Nano (Also the most popular one): Compact and powerful, the Nano is a smaller version of the Uno, suitable for projects with space constraints. It offers similar functionalities but in a smaller form factor.
3. Arduino Mega (It is also most used one): If your project requires more input and output pins, the Arduino Mega is the go-to option. With additional pins and enhanced capabilities, it is ideal for larger and more complex projects.
4. Arduino Due: Designed for more advanced users, the Due features a 32-bit ARM processor, providing increased speed and performance. It is suitable for projects that demand higher processing power.
5. Arduino Pro Mini: The Pro Mini is a stripped-down version of the Arduino Uno, ideal for projects with tight space requirements. It lacks a built-in USB interface, and programming is done using an external adapter.
6. Arduino Leonardo: The Leonardo differs from the Uno in that it can emulate a computer mouse or keyboard, adding versatility for projects that involve human-computer interaction.
7. Arduino Nano Every: An updated version of the Nano, the Nano Every feature the ATMega4809 microcontroller and offers enhanced capabilities. It is an excellent choice for compact yet powerful projects.
8. Arduino MKR Series: The MKR series includes various boards like MKR1000, MKRZero, and more. These boards are designed for IoT projects, featuring built-in Wi-Fi or other communication modules.
9. Arduino Yún: Combining the power of Linux with the simplicity of Arduino, the Yún allows you to create projects that involve both microcontroller and computer functionalities.
10. Arduino Pro Micro: Similar to the Pro Mini, the Pro Micro is a compact board, but it includes a USB interface for direct programming. It’s suitable for projects with limited space. These are just a few examples of the diverse Arduino family, and each board caters to different project needs. The right choice depends on factors such as project complexity, space constraints and desired features.
Now, let’s move deeper into the most widely used Arduino board Arduino Uno
Arduino Uno
Overview
Arduino Uno is the cornerstone of the Arduino platform, best known for its simplicity, accessibility and robust capabilities. Whether you’re a beginner taking your first step into the world of electronics or a seasoned builder pushing the boundaries of innovation, Uno serves as a reliable companion.
Key Features
- Microcontroller (ATmega328P)
- Digital I/O Pins (14)
- Analog Input Pins (6)
- USB Connector
- Voltage Regulator
- Power Jack
- Reset Button
- Crystal Oscillator
- Built in LED
- TX/RX Pins (Transmit/Receive)
- ICSP Header (In-Circuit Serial Programming)
- 3.3V and 5V Pins (Voltage Output)
- GND (Ground) Pins
HERE ARE SOME IMPORTANT FEATURES YOU HAVE TO KNOW INORDER TO GETTING STARTED.
1: Microcontroller (ATmega328P): It is a chip; it serves as a brain of Arduino UNO located on the center of Arduino board. The ATmega328P is a popular 8-bit microcontroller that is part of the AVR family from Microchip Technology. It not only the brain of UNO but behind many types of Arduino like NANO and MINI. This is the great choice for beginners and hobbyists who going to getting started in Electonics.
2: Digital I/O Pins: This board has total 14 Digital Input Output Pins through which a person can attach digital components with Arduino the component can be of Input or Output.
3: Analog Input Pins: There is total 6 Analog input pins which serves as a taking input from analog devices which vary their values.
4: USB Connector: Arduino board has USB connector for programming the board. Once Arduino is connected with PC, user can compile and upload the written code into the Arduino board.
5: Power Jack: Arduino has a Power jack through which voltage can be given to the Arduino. Power jack is located on the left side of USB Connector on the front side. Arduino takes total 5V of Voltage as an input so a person can connect 5V of voltage source to the power jack.
6: Reset Button: When you press the reset button, it briefly cuts power to the Arduino on the board. it basically restarts the program that is currently running, causing it to start from scratch. This can be helpful if your program is stuck or behaving unexpectedly.
7: Built in LED: This LED is normally connected to pin number 13 on Arduino board and can be controlled in your code to turn on, off and blink. It is mostly used for basic learning and testing purposes. (ARDUINO IDE HAS A BUILT IN CODE TO BLINK BUILT IN LIABRARY).
8: TX/RX Pins (Transmit/Receive): TX (Transmit) Pin: This pin sends data from your Arduino to another device. Think of it as your Arduino’s “mouthpiece” speaking to the outside world. RX (Receive) Pin: This pin receives data coming into your Arduino from another device. Think of it as the “ears” of your Arduino listening to others.
9: 3.3V and 5V Pins (Voltage Output): Arduino UNO microcontrollers has 3.3V and 5V pins for getting output, you can give 5V or 3.3V output to your sensors or components connected with Arduino.
10: GND (Ground) Pins: Ah, the humble GND pin! Often overlooked but absolutely very important. There is total five GND pins on the Arduino Uno, usually labeled with “GND” or a black symbol. You’ll find them scattered around the board, making it easy to connect any component that needs a ground connection.
Programming
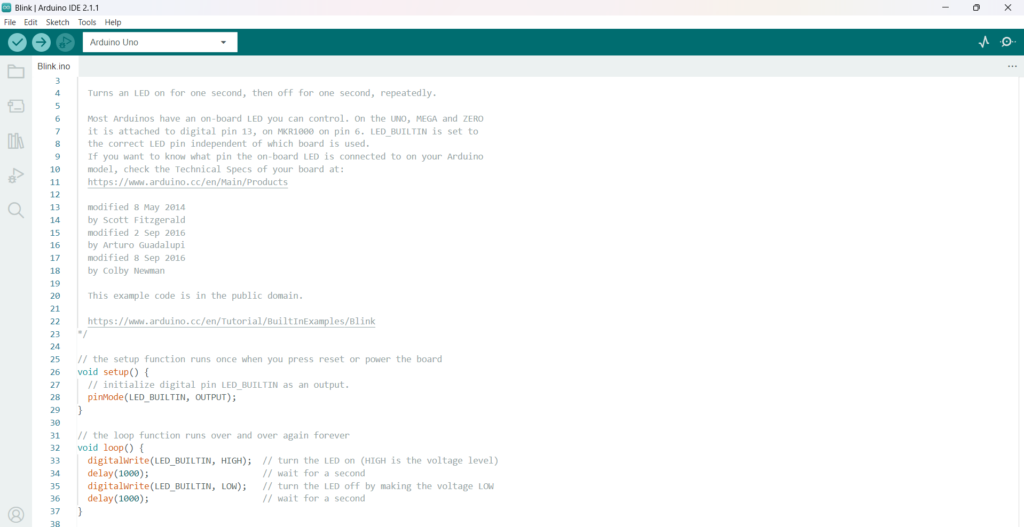
Programming the Arduino Uno is a straightforward process. The Arduino Integrated Development Environment (IDE) provides a user-friendly platform for writing, compiling and uploading code to the board. The coding language is based on Wiring, a simplified form of C++.
Applications
The versatility of Arduino Uno makes it suitable for an extensive range of projects, including but not limited to:
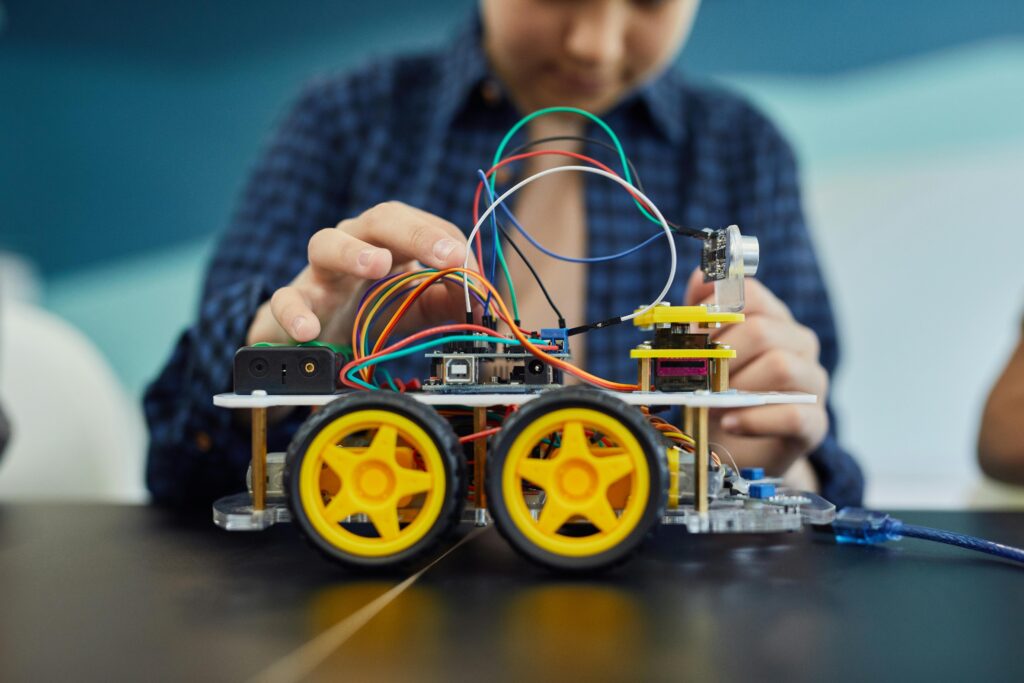
- – Basic Electronics-based experiments and simple robotic cars.
- – Sensor-based projects such as temperature monitoring or motion detection.
- – Educational purposes to teach programming and electronics.
Community and Resources
A major strength of the Arduino Uno lies in its large and active community. Countless online resources, tutorials, and forums offer support and inspiration for both beginners and experienced users. Arduino’s open-source nature encourages collaboration and sharing of ideas.
Conclusion
In essence, the Arduino Uno is not just a microcontroller board; It is an invitation to explore, create and learn. Its simplicity, combined with powerful features, makes it an excellent choice for anyone delving into the exciting world of electronics and programming. Whether you’re a student, hobbyist, or professional, the Arduino Uno is a reliable and versatile tool for turning your ideas into reality.
Leave a Reply to Shah Zaman Haider Cancel reply