Drone Flips on Takeoff [SOLVED]: 8 Easy Ways to Fix | robetix
Introduction
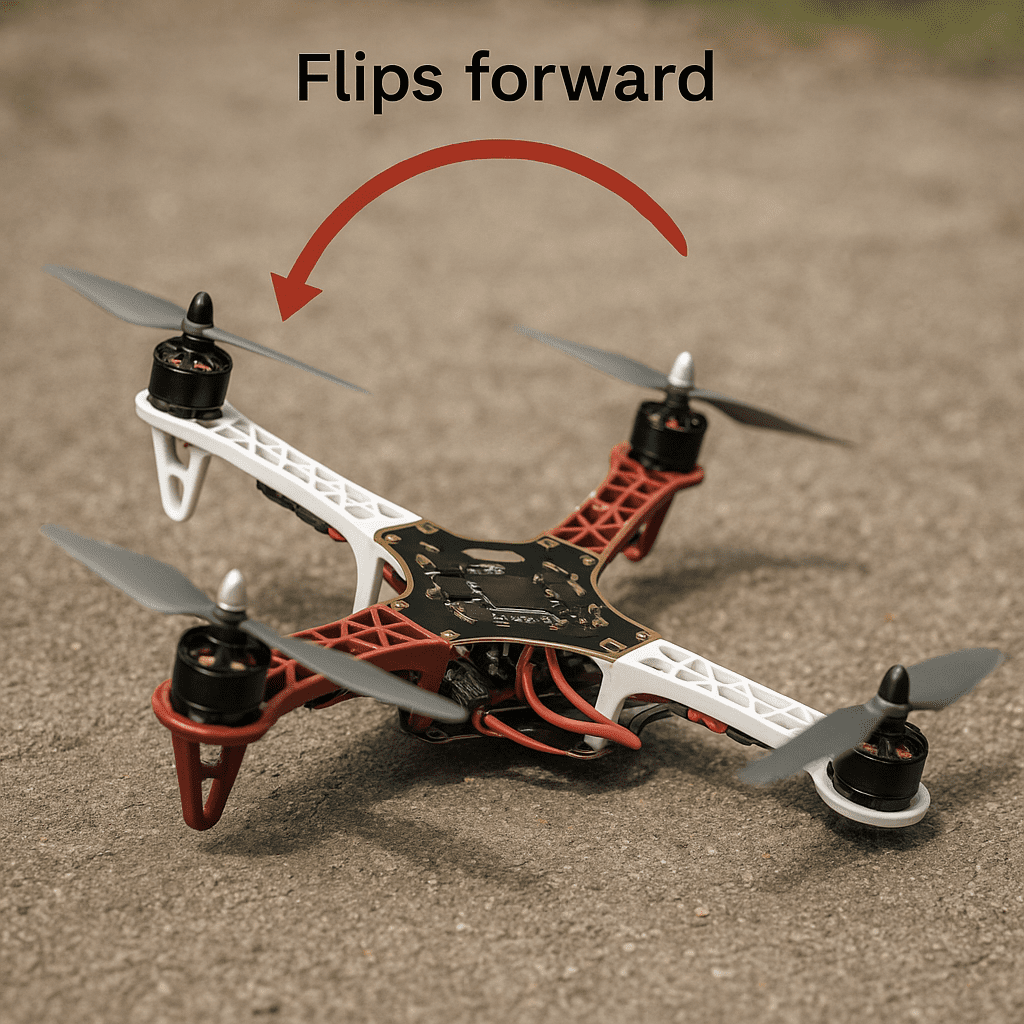
Why Your Drone Flips on Takeoff
In this article, we will discuss the major problems that causes drone flips on takeoff, this often arise after completing the building of a drone. We’ll focus on quadcopters, but the solutions we discuss here can also apply to other types of drones like dji fly, hexacopter, uav, novum drone, dji unlock e.t.c.
If you’re just starting to build a drone, check out our detailed guide on Building drone with step-by-step pictures.
Now, you’ve built your drone, everything seems fine, but when you try to take off, things go wrong. It flips over then Don’t panic. This happens to a lot of people, especially when building a drone for the first time. This guide breaks down the most common reasons your drone flips and how to fix each one step-by-step.
Most commonly, people use the APM 2.8 to build their quadcopters. Don’t know what APM 2.8 is? explaining it in detail. There’s also a chance that your flight controller might be faulty—make sure to read our guide to check whether your flight controller is working properly.
If your flight controller is fine, then try the solutions below to fix the flipping issue with your drone.
ESC Calibration
How to do ESC Calibration for Quadcopter
One of the main reasons your drone flips over is improper ESC calibration or skipping it altogether.
A well-calibrated ESC significantly improves flight stability. If all motors start and stop at exactly the same time, it indicates a successful ESC calibration.
One critical task that often needs to be repeated is ESC calibration.
Follow this step-by-step guide to calibrate the ESCs:
1. Unplug the battery.
2. Move the throttle stick to the highest position.
3. Connect the battery and wait until the APM LEDs start blinking red and blue.
4. Disconnect the battery, then reconnect it again. Wait until the red and blue lights start blinking again.
5. Lower the throttle stick to the lowest position.
6. Finally, disconnect and reconnect the battery once more to complete the ESC calibration.
Propellers Installed Wrong
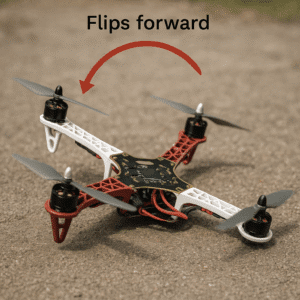
Why Quadcopter Flips Over the Nose
This is one of the most common problems. If your drone can’t lift off or keeps flipping, check if the propellers are installed on the correct motors and not upside down. Each propeller has a specific direction. For example, if you’re using 1045-size propellers, they come in Clockwise (CW) and Counter-Clockwise (CCW) pairs. You must place the correct propeller on the correct motor.
Different types of drones have different propeller orientations. A quadcopter setup is different from a hexacopter, and an octocopter has its own arrangement too.
It also depends on the size of the propellers, so in this article, we’ll focus only on 1045-size propellers.
Here’s the correct way to install 1045 propellers on your motors:
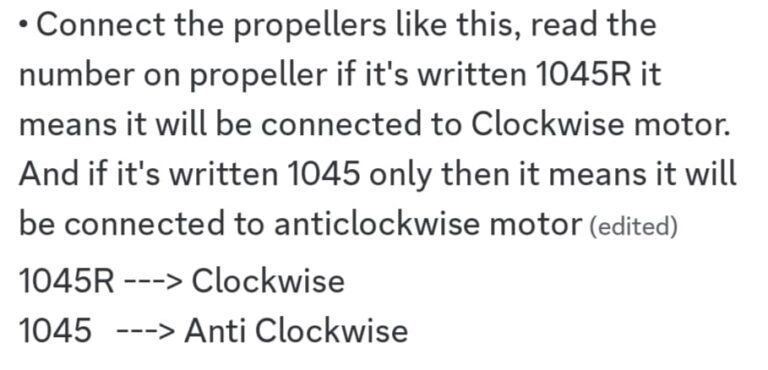
Motors Rotating in Wrong Direction
How Incorrect Rotation Causes FPV Drone Flip
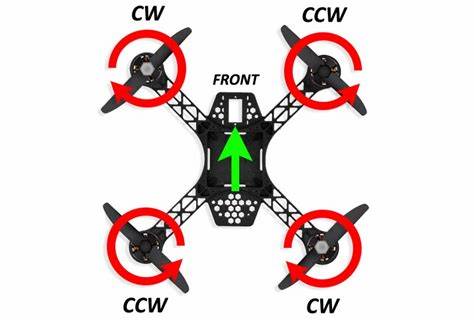
Even if the propellers are installed correctly, incorrect motor spin direction is another common issue that can cause these problems. Always double-check the motor spin direction using your drone’s motor layout diagram.
Important: Remove all propellers before testing motor direction to avoid any accidents.
Below is the motor direction diagram for a quadcopter that you should follow to confirm the motors are spinning the correct direction:
Drone Not ARMED
Quadcopter not ARMING Problem Solved
Another big reason I personally faced, after powering up the drone and doing everything correctly, like installing the propellers properly, checking motor rotation, completing ESC calibration, and all the required steps, was that the drone still wouldn’t fly. It’s easy to panic at this point, but don’t get discouraged.
You might have simply forgotten to ARM your drone.
Don’t know how to ARM your drone? Follow these steps:
1. First, perform the ESC calibration.
2. Next, wait for the GPS (M8N) LED to turn blue.
3. Then, arm the drone by holding the throttle stick down and to the right for 5 seconds.
4. Once armed, slightly raise the throttle to start the motors. Then lower the throttle—if the drone is armed correctly, the motors should keep rotating at constant speed.
5. Another way to confirm whether drone is ARMED or not is if you are using APM 2.8 then do the steps discussed above to ARM after that observe the LED’s on APM if these are static RED/PINK (not blinking), it means your drone is ARMED.
Flight Controller Installed the Wrong Way
Drone flipping can also happen if the flight controller is facing the wrong direction. Your flight controller has a small arrow printed on it; this arrow must point toward the front of the drone.
You should first decide what the front of your drone is. For example, many people use red arms for the front and black arms for the back, or any color combination you prefer. Once you’ve decided, make sure the arrow on the flight controller points in that same direction.
If the flight controller is installed facing the wrong way, your drone won’t respond properly to controls.
You can verify the orientation using Mission Planner, Betaflight, or any software you are using.
Flight Controller Arrow
Direction Before Flying
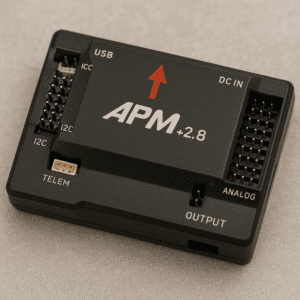
Before flying your drone, first check the direction or arrow on your flight controller. Whatever direction it’s pointing, stand facing that same direction, so the flight controller’s arrow is pointing toward you.
In other words, the arrow on the flight controller should face toward the receiver.
Wrong Flight Controller Settings
Plug the USB to your drone and connect to PC and open Mission Planner or any software you have and make sure the 3D model moves the same way as your real drone. Also, check that the frame type is set to something like “Quad X” if you’re using a basic quadcopter layout.
Propellers Nuts Are Loose
If a propellers nut is loose, it won’t create enough lift or thrust to make the drone fly correctly. So, Hold the motor and try to twist the prop. If it moves, tighten the nut more. Make sure all props are secure before flying.
Conclusion
Before getting frustrated, take a step back and go through each of these checks one by one. In most cases, it’s something small that’s easy to fix. and it’s not only unique to you it happens to every drone builder, once you’ve sorted out these basics, you’ll be in a much better position to fly safely and smoothly. Hope you will get your drone fly.
If the problem still isn’t resolved, feel free to contact me through any of my social media accounts or email me.

Arduino vs Raspberry Pi | 15 Differences | Raspberry Computer and Arduino | Its Uses | robetix.com
Read More »SHARE WITH YOUR FRIENDS

bhai 21 April k bat koy article nhi aya… koy artical post kro hm n parhna h
Bhai jald hi arha hai article, Embedded Systems par, Stay Tuned 🙂
Like and Share